Showing posts with label Medieval clothing. Show all posts

Monday, 19 October 2015

Challenges


Life's full of challenges, and some of them are all about textiles...

The Historical Sewing Fortnightly/Monthly
After an enthusiastic start in early 2014, I think I can safely say that I utterly failed to complete any more of the Historical Sewing Fortnightly's challenges, even when it changed to its current monthly format... Alas, too many things to do; too little time to do them in.


The Manuscript Challenge
In August 2014, I joined the Manuscript Challenge and failed to complete it within the specified year. I did a little better than with the Historical Sewing Fortnightly, though. For the Manuscript Challenge, I choose this picture from the Weltchronik in Versen: MS BSB Cgm 5, fol. 44v. The manuscript is from around 1370 and belongs to the Bayerische Staatsbibliothek, Regensburg, Germany.

 
Rebecca. Weltchronik in Versen, c. 1370. Bayerische Staatsbibliothek.

It's Rebecca from the Bible, looking fashionable in a lovely red dress lined with ermine, worn over a green dress, and with an amazing kruseler that looks like a decorated cake. What's not to love about this image?!

My plan was to weave the fabric for the overdress, dye it with madder, spin the sewing thread and sew the whole thing by hand. I also decided to weave the fabric for the green underdress, while buying the fabric for the kruseler. I had never made a kruseler before (they're bit out of my fanciness league, at least one as sumptuous as this) and I didn't want to risk messing up a handwoven fabric on this first attempt.

I did actually finish the first part of the challenge - the red overdress. It's my Weaving Vadmal-dress. It turned out more rustic-looking than I imagine Rebecca's dress to be, because my fabric is on the coarser side and it's cut a lot more...economically. Obviously I left out the ermine lining altogether. 

The kruseler, then. Well, it's an ongoing project that I drag out from underneath the big pile of UFOs (UnFinished Objects) every once in a while to work on it for a few hours. At the moment, it's just a bunch of wide linen strips that need to be hemmed. Let's just say I'm not overly excited about hemming about 10 miles of linen strips, and leave it at that... 

The green fabric is still hanging around somewhere in the planning stage. I have one or two (perhaps even three) projects for the Big Loom that I'm much more excited about and it might get bumped even further down the queue. I do have the yarn, but I'm in no hurry to do anything about it for the time being. 

To sum things up, the most accurate status for my Manuscript Challenge right now would probably be Dormant But Not Dead.

But then something else came along about a month ago...


The Herjolfsnes Challenge!
The warp that was in my loom when the Herjolfnes Challenge was announced was already meant to become fabric for a Herjolfsnes 39/D10581 dress, so I joined straight away. I don't expect the fabric to be anything like the original, though. The wool's not quite right, and I don't have enough weft yarn to make the typical Herjolfsnes weft-faced 2/2 twill either. I will just have to make do with a generic medieval twill. Which will be red...bright madder red, quite the opposite of the undyed fabrics used for the Herjolfsnes garments. I will put the challenge efforts into the cut of the garment, and the seams and finishing techniques rather than the fabric itself...


Yep, that's the warp yarn. It's quite red.
I have these old, full-scale Herjolfsnes patterns from Nationalmuseum in Copenhagen that I have been meaning to try out for years and, encouraged by the Challenge, I finally dug them out only to discover that one of them was actually for Herjolfsnes 39 (although it certainly didn't look it at first glance). 

Full-scale Herjolfsnes patterns from Nationalmuseum, Copenhagen, with suspiciously long sleeves in the line drawing of number 39... I bought these some 10 years ago and the museum doesn't sell them anymore.


So I decided to use the ready-made pattern rather than making my own. When I checked its measurements against those given for the preserved dress, they seemed to be pretty close. These patterns were made by Else Østergård and Lilli Fransen and I think that they are pretty much the same as the ones that ended up in their book Medieval Garments Reconstructed (Nordbomønstre. Dragtsnit fra middelalderen in Danish).

Project sketch for my challenge dress.

I made a cotton mock-up to test the pattern. The only alteration I made was to add 25 cm to the bottom of the dress, so it would reach the floor. Other than that, I used the original measurements.

I didn't have enough fabric to make both side panels reach the floor, and I had to skip one of the sleeves, but there was enough of the dress to decide that the fit was absolutely perfect! And look at those draping folds in the middle picture. I'm SO looking forward to making this dress!

I got so enthusiastic about the Challenge that I couldn't wait until I had finished weaving the fabric. I wanted to make something straight away. In my stash I found a piece of old handwoven twill and decided to make it into an 'in-between challenge', to practise the seams and finishing techniques. The choice fell on hood number 72/D10602 as it was included in the full-scale pattern.

The pattern given for the hood 72/D10602 in Medieval Garments Reconstructed is bigger than the original to make it possible to pull it over the head without adding an opening (the original is just too tight for that).
 
Trying out the 'sømmesting' which is described as an invisible stitch sewn from the right side
in Som syet til jorden (Woven into the Earth).

Finishing the hem with a tabby-woven edge.

The finished hood, with close-ups of the woven edge.

Fabric: handwoven and fulled 2/1 twill.
Seams used: 'sømmesting' from the outside for the assembling seams, overcast stitches to sew down the seam allowances, two rows of slanted stab stitches around the face opening, singling around the lower edge.
Weaving: 'foot weaving' (ordinary tabby) around the lower edge, done with the same handspun thread used for the sewing.

Differences from original hood: 

Size (see above).
Sewing thread is Z-twisted instead of S-twisted.
2/1 instead of 2/2 twill
The edges weren't preserved on the original so the finishing techniques are taken from other Herjolfsnes hoods.


References:
Nordbomønstre. Dragtsnit fra middelalderen (Medieval Garments Reconstructed) - Lilli Fransen, Anna Nørgaard & Else Østergård, 2010.

Som syet til jorden (Woven Into the Earth) - Else Østergård, 2003.

Tuesday, 7 July 2015

Weaving Vadmal VI - The Dress

At long last, I'm finally able to post a few pictures of the finished dress made from my hand-woven, fulled and plant-dyed fabric of the previous posts!

I had hoped to get some nice photos of it during Albrechts Bössor's spring march/fighting practice in early May, but it was so cold then that I never removed my overdress during the three day camping-in-the-forest event. It even snowed a little!


But the sun came out for a bit so I could hitch up my overdress without freezing my legs off!

This past weekend, however, was the opposite of cold. It was also the re-launch of Medeltidsdagarna at Hallands Kulturhistoriska Museum, an event that Albrechts Bössor have been proud to attend for several years with our living history display. For some reason, the Varberg event always tends to be very, very hot and this year was no exception. It was well over 30 degrees and we had our camp pitched on top of the ramparts with little shade during the day. Needless to say, I didn't have to worry about the overdress this time... So here it is: the (almost) finished dress!
Staying cool in wool, with a reed hat
Picture (cropped) by
Sarah


Me talking about medieval textiles during our 'From sheep to hem'-display
(Från får till fåll - it sounds a lot catchier in Swedish...). Picture by Karl


I still have to do the buttons for the sleeves, but other than that, it's done!

Here you can find more pictures from Medeltidsdagarna; Albrechts Bössor are in quite a few of them!

Friday, 27 February 2015

Weaving Vadmal V - The Finished Fabric

In medieval times, the fulled fabric was stretched on tenterhooks while still damp to get its final shape (from which we get the English expression 'to be on tenterhooks'). Not having a tenter around, or even a wall on which to nail my fabric, I had to make do with the slightly more modern finishing treatment of rolling it on a plastic tube instead. And re-rolling it once a day until it was completely dry. Normally, this wouldn't have been a problem. As it happened, me and boyfriend J-E were leaving to go backpacking in Switzerland the day after I returned from the fulling mill... No time for the fabric to dry.

Rolling the fabric (or keeping it stretched out) while it dries is rather important to get a good finish and remove any wobbliness introduced into the fabric by the violent fulling process. Skipping this stage was not something I wanted to do after spending so much time and effort on my fabric... Letting it dry on the plastic tube was not an option either; I didn't want to risk it going mouldy in my abscence! Eventually, I resorted to a kind of speed drying that worked surprisingly well: The house we live in has room for drying laundry in, equipped with a great big hot air fan. I stayed up all night (more or less), re-rolling my fabric every couple of hours, letting it sit on the plastic tube in the drying room in between.

Fabric. On a roll!
The result was that, by morning, my fabric was completely dry and had been stretched and rolled just as many times as it would have been had I done it the proper way. And it was nice and smooth too. Success!

After two weeks of trains, medieval churches struck by iconoclasts and quite a few alps and weird biscuits, I was back home and ready to cut my cloth. 

Swiss Collage: Best train ride ever! - Neuchâtel tomb - Happy Swiss biscuits
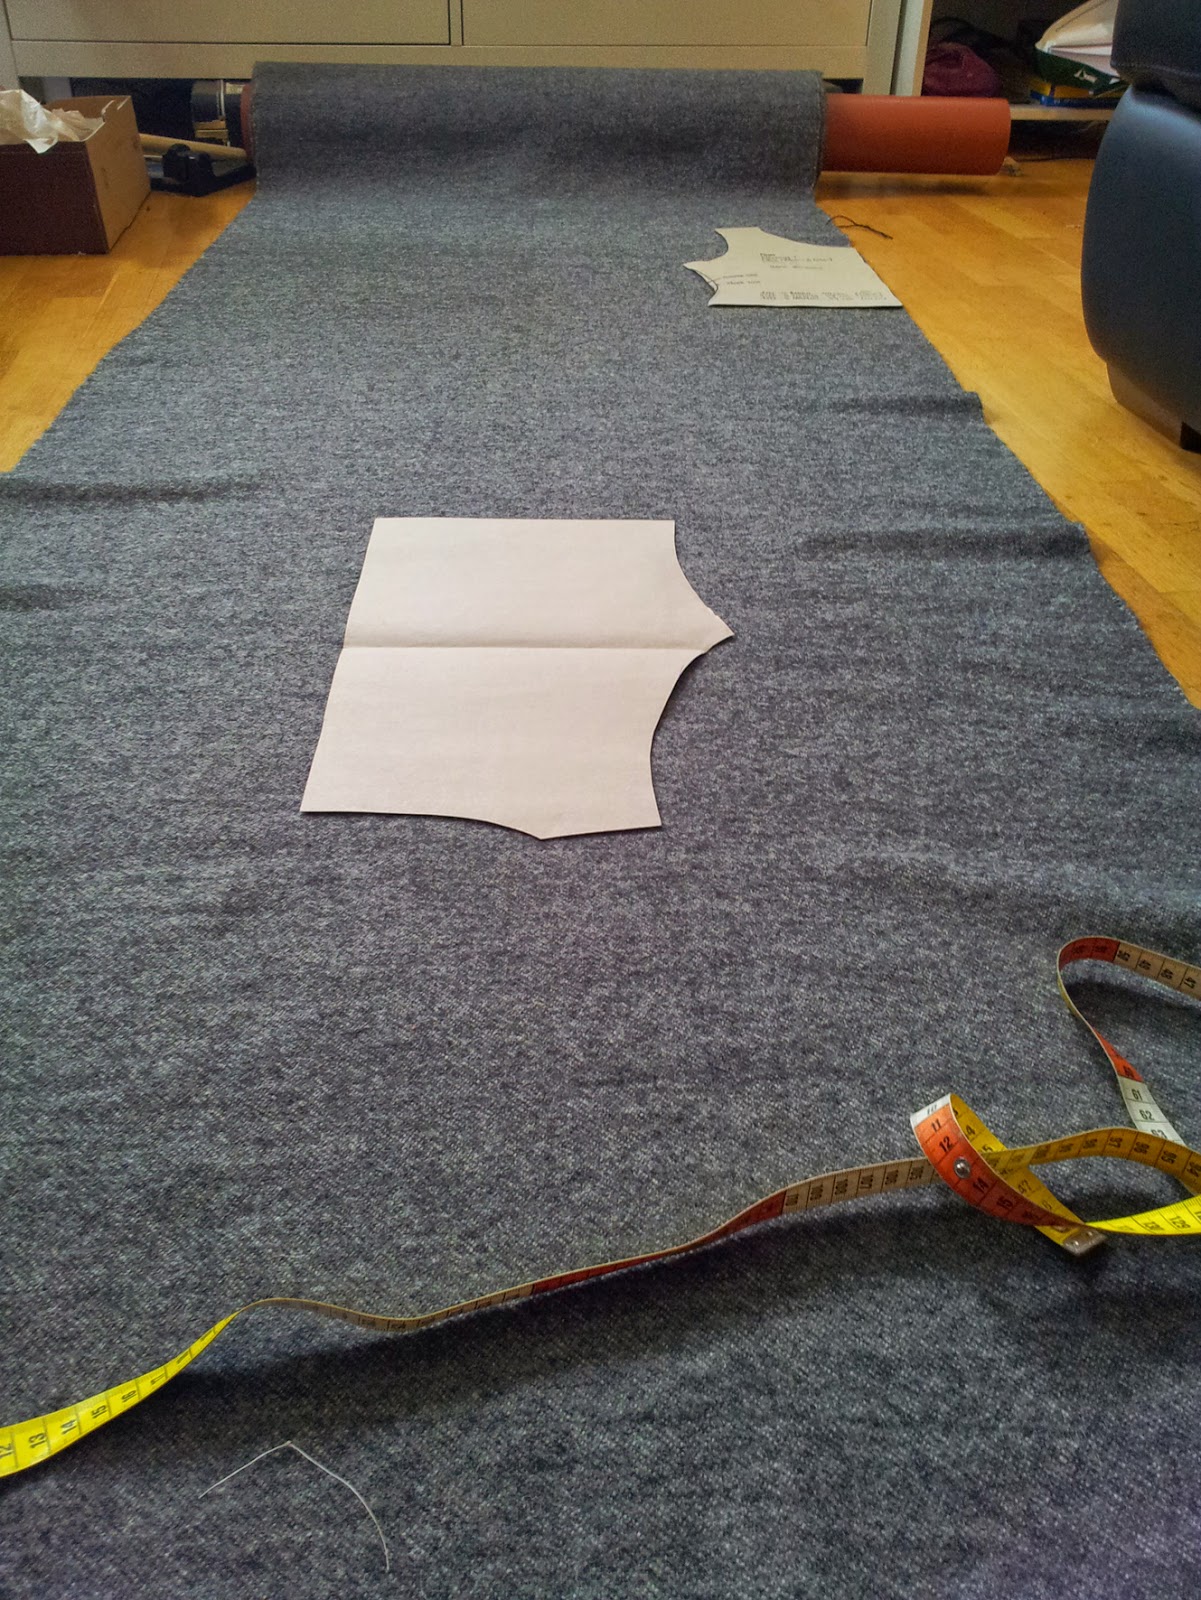
I used the body block I made for my supportive shift as a basis for cutting out the pieces. I've made enough dresses of this rather simple late 14th century style for myself to know how they work on my body, so these days, I usually do the fitting on myself with the real fabric, skipping the mock-up stage. I prefer dresses without back and front seams, so all the tweaking to get the fit right is done in the side and shoulder seams. Cutting with a little extra seam allowance in those areas gives me enough room to do the necessary adjustments. For this dress, I wanted to have lacing down the front, but I still put all the shaping into the side seams. I calculated that I could get at least two long-sleeved dresses out of my fabric, and probably something small like a hood, if I cut it economically. Eager to get going, I cut. 
 
Pattern pieces
The first cut! The brown thread marks one of the three weaving faults in my cloth...
And then realised that I should probably have added at least another centimetre of extra seam allowance since I was going to dye the damn things too! Mordanting and dyeing the cut pieces would almost certainly wreak havoc on the raw edges and ruin my precious seam allowance... Ah, well. I threw them in the dye pot anyway.

I had enough madder left for a weak 14% dye. This wouldn't be the bright red I got on my sample, but I was fine with that. I just didn't want a completely grey dress... Still, I was surprised by how strong the colour ended up – not a muted, watered-down pink like I had expected, but a cheerful orange, only tempered by the dark weft! The edges did fray, but not too badly. The seam allowance on the Herjolfsnes garments is about 7 mm and there was at least twice that left, so I had no reason to complain. 
 
Both the colour and the frayed edges turned out a lot better than expected
Despite this vadmal project, spinning was really my main focus last year (I just realised I've spent almost 5 years just practising spindle spinning! My blog post from 2010 sounds awfully naive, now!). I finally mastered (well, sort of) spinning with a distaff, which seemed like a necessary skill to accquire if I wanted to spin the way it was done in medieval times (there are practically no medieval depictions of spinners not using a distaff) and I tried my hand at producing sewing thread.
 
A slightly hairy thread...
I could probably make it thinner with more practice (after all, the 2-ply sewing thread from the Herjolfsnes garments is less than 1 mm in diameter), but it turned out to be a perfect thickness for my vadmal fabric as it was. My sewing thread has a lot of give in it; I think this will be a very good thing for a tight dress. The thread will take a lot more strain before breaking than the 2-ply linen I usually use for hand sewing.

All that's left now is for me to finish the dress... And decide what to do with the rest of the fabric!

Felling the shoulder seam à la Herjolfsnes

To sum things up: 
My version of a medieval vadmal fabric ended up with the following technical specifications after fulling, drying and dyeing: 

Weave type: 2/1 twill 
Warp: light natural grey 1-ply wool, z-spun, 9 threads/cm 
Weft: dark natural grey 1-ply wool, z-spun, 10 threads/cm
It was fulled in cold water for approximately 4 hours, with a total shrinkage of 10% (width) 
Finished width: 82 cm 
Finished length: ca 11 m
Dress pieces dyed with 14% madder.

Next time: Weaving Vadmal VI - The Dress

Tuesday, 18 February 2014

The Historical Sew Fortnightly: Challenge 1 & 4

http://thedreamstress.com/the-historical-sew-fortnightly-2014/
After some internal debate ('I don't need more things to sew. Or time constraints!' -'Yes, you do. Besides the Facebook group is really nice with lots of interesting stuff and knowledge going on there.'), I joined the The Historical Sew Fortnightly a couple of weeks ago.

I had already finished the first challenge by then (Make Do and Mend), because I had first decided to just tag along in secret this year and do the challenges I felt like doing. Which is kind of stupid, since that's pretty much the prerequisite for actally taking part, and I'd just miss out on the sharing-your-work-with-others-bit. However, I felt it was a bit late to post the first challenge when I joined, so I've decided to lump it together with challenge #4: Under It All in this post (I had really intended to do challenge #3: Pink, too, but failed to even start on the mock-up for the pattern...). So here goes:

The Historical Sew Fortnightly Challenge #1: Make Do and Mend
An apron for the late 14th century.
I've used the same old apron for years and years and it's one of the first handsewn things I made, before I even started making historical clothing. I've used it for everything from LARPing to protecting my ordinary clothes while sorting and preparing dirty wool for spinning. The stitching was kind of clumsy and the piecing on the waistband with a seam ending up centre front annoyed me. My first attempt at rolled hems wasn't exactly a success either. So after 12 years of use, I thought it was finally time to redo my apron. I removed the waistband and re-did the piecing. I cut off the fraying rolled hems, folded the edges and sewed them down with overcast stitches instead. Instead of the deep knife pleats I'd used on the top edge of the apron, I simply gathered it to the waistband which I stitched on with small stab stitches.

It's a linen apron of a type that can be seen in pictorial sources from the early 14th century and onwards. Sometimes, contemporary images seem to depict aprons with smocking, but since they are amply represented within the 14th century reenactment community as it is, I chose to keep mine simple and more suitable for my social standing.
After looking at the first photo, I decided to apply my very non-14th century iron to the apron and take another one...
The Challenge: #1: Make Do & Mend
Fabric: Linen (it used to be unbleached, but now almost white...)
Pattern: None
Year: 14th century
Notions: Linen thread
How historically accurate is it? It's handsewn with waxed linen thread and the materials are correct (but not handspun or handwoven, though). No medieval aprons have survived to this day, but it's based on contemporary pictorial sources, so it's almost as accurate as it's possible to get.
Hours to complete: approximately 3 hours
First worn: The day after it was finished (mid-January 2014) when washing wool in the bath tub.
Total cost: All the fabric came from the original apron, the sewing thread from my stash, so it didn't cost anything.

The Historical Sew Fortnightly Challenge #4: Under It All
A supportive linen undergarment
Linen cap, fake flax braids and a push-up shift
The Challenge: #4: Under It All
Fabric: Unbleached linen
Pattern: Self made.
Year: 14th century
Notions: Linen thread, some hemp string for lacing it up
How historically accurate is it? It's handsewn with waxed linen thread and the materials and sewing techniques are historically accurate (nothing handspun and handwoven, though). No supportive shifts have survived from the 14th century, but written sources mention some sort of supportive undergarment with 'bags' for the breasts in the 14th century (the now-famous underwear from Lengberg Castle in Austria are too late for me, being from the late 15th century). I've simply taken a page from Isis Sturtewagen's book (or rather her blog Medieval Silkwork!) and defer to her research and the 'bra-shirt' she made, based on a c.1360 statue from Münster zum Heiligen Kreuz in Schwäbisch Gmünd, Germany.
To sum things up: It's a 'plausibly medieval' garment, the look of which is based on a single medieval depiction.
Hours to complete: approximately 12 hours, with an additional 3-4 hours for fitting the body block used as a base for the supportive upper part.
First worn: During Albrechts Bössor's annual winter march on February 15, but it wasn't quite finished at the time. I added a couple of lacing holes and hemmed it afterwards.
Total cost: All materials came from my stash, so it didn't cost anything.

In the pictures below, it's worn under my blue woollen dress (without the apron). The woollen dress is tight, but not supportive. It's pulled on over the head and wriggled into - so the supportive underdress really helps to give me the somewhat 'pushed-up' late 14th century look. To make sure the fabric of the overdress would be nice and smooth in the chest area, I put the lacing of the underdress in the side seam.


Tuesday, 24 December 2013

A Cloak for a Medieval Pilgrimage

The cloak
I have an inexplicable passion for short cloaks. They're not the commonest or most documentable of garments, though, especially not for late 14th century women. When it comes to preserved examples, there's the famous Bocksten Man's cloak, which is c. mid-14th century, male, and not particularly short. Then we have the wonderful Cloak of St Brigitta, which is...patchwork, but not short either.

Various types of outer clothing, including cloaks, are mentioned in several medieval Scandinavian wills. The words cappa and mantel are used, among other terms, and while mantel seems to be the more feminine version of the two, both are used by both men and women, it seems. The wills don't say much about the construction of the garments that go along with the different terms, though – whether they are long or short, open or closed... If you read Scandinavian languages, I recommend Kläderna och människan i medeltidens Sverige och Norge by Eva Andersson and the papers by Camilla Luise Dahl in Middelaldercentret's Workpapers vol. 1 for discussions and definitions of various medieval terms for outer clothing.

There are numerous cloak-wearing shepherds in various manuscript from all over the 14th century, all male. From Sweden, we have these two lovely carved fellows from Martebo Church on Gotland, receiving the message of the birth of Christ.
Shepherds from Martebo Church, Gotland. The second one is playing a dog-headed bagpipe. Early 14th century. Pix by Vix.
More often than not, these cloaks have hoods and look more like...well, huge hoods. I personally like to call them hoods, to differentiate them from hood-less cloaks, but this is my modern preference and it may not have anything to do with how these garments were defined in medieval times, of course (I actually tend to call them 'jättehätta', literally 'big hood' – it sounds a lot funnier in Swedish). 

Here's a rather slim selection of 14th century women wearing some sort of short cloak-like garment. The first two are Italian, which is perhaps not the best source when you're reenacting Scandinavia/North Germany like I do. They seem to have done a lot of things quite differently south of the Alps. The last three images are a bit more interesting to me, as they are German in provenance. They all come from an appliqué wall hanging showing episodes from the romance of Tristan and Isolde. Although not particularly detailed, some of the ladies do seem to be wearing what might possibly be interpreted as a short cloak.
BNF MS Français 343: La Quête du Saint Graal et la Mort d’Arthus, fol. 49v.
http://visualiseur.bnf.fr/ConsulterElementNum?O=IFN-08100553&E=JPEG&Deb=59&Fin=59&Param=C
Tacuinum Sanitatis, late 14th century, Italy. There are more examples of short cloaks in this manuscript, on both men and women.
The Tristan wall hanging, 1370-1400, Germany. Victoria & Albert Museum. Pix by Vix.
I've found that a good place to look for cloaks is on monumental tombs. All those weepers and mourners that decorate fancy people's graves tend to wear more outdoorsy clothing than most. I've no idea why. Maybe it's something to do with the transitional aspect of death and burial, funeral processions or the journey of the soul, as cloaks appear to be typical travel clothing (or maybe that's just my modern schooling struggling to assert itself with fanciful interpretations...). Maybe they just liked their weepers bundled up properly; after all, it can get rather chilly hanging around a tomb waiting for Judgement Day. And so it was that I found my Favourite Cloak Ever: This weeper from the tomb of Thomas and Catherine de Beauchamp in St. Mary's Church, Warwick, dated to 1369. 
De Beauchamp Weeper, Warwick, 1369. From http://www.themcs.org/
I just had to make it, nevermind the fact that it's a one-off garment I've never seen anywhere else - in Albrecht's Bössor we usually require at least two independent sources as basis for the kit we make. It's also English, but I decided to make a prototype anyway of some left-over fabric I had lying around just to see what it would look like. The fabric was a really nice 2/1 twill, but I only had some rather narrow pieces left so the cloak ended up being pieced together of triangular gores.
Me in my 'Warwick' cloak
I liked the model so much that I did a "proper" one, too, in grey and without the piecing. Both have tablet-woven edges around the arm-slits and buttons down the front and they are wonderful bad-weather clothing! Unlike open cloaks, they don't flap open and let out the warmth when you move, and since they're short, they don't get stuck in the vegetation when you walk in a forest, for example. At least not as often as a long cloak does. I haven't mustered either cloak for use with Albrecht's Bössor (we have informally formal inspections of our clothes and gear in AB, to maintain a mutual standard and encourage members to research their stuff) and I don't think I will either, since I personally feel it's slightly off for our chosen period, at least geographically. I make things like these because it's fun, because I learn stuff doing it, not necessarily because I will use them for serious reenactment.

As I wrote in the previous post, planned events really get me working on Stuff I Need – I find deadlines incredibly inspiring! For the medieval pilgrimage I took part in in May this year, I both needed and wanted some clothing for bad weather that would also measure up to the standards I have set for my medieval kit. And that would pass muster for Albrecht's Bössor too, preferably. The usual answer to dealing with cold and rain when wearing medieval clothing is simple: just add another layer. And that's all well and good. But if you're spending a day or two outdoors in constant rain, you will get wet, no matter how many layers you put on. And although wet wool still keeps you warm, it only does so to a certain point and eventually the chill will get to you. It does make a difference if you wring out the water occasionally – wool can retain a good deal of moisture before it starts dripping by itself so it needs a bit of help. Wet wool slowly channels the water towards the lower points of the garment (that's gravity for you!), which means that if you're wearing something with sleeves, some of the water will inevitably stick around around your arms. With a cloak, on the other hand, the water will eventually end up in the lower edge (where it's easy to wring out) and generally the wet fabric stays further away from you body than it would with a fitted garment. So, in short – when it's raining, I want a cloak!

I settled on making one with an integral hood, the shepherd model. The evidence of women wearing a garment like this is...well...basically non-existent, at least in the north European art I've looked at. Short cloaks and hoods with an extended collar seem to work for both sexes, though, so I decided to extrapolate a little. If a woman can wear a hood that reaches half-way down her arms, like the two female servants from Martebo Church on Gotland do, it's not a huge step to lengthen the hood 30 cm so it reaches over the hands. 

Edit: People have commented that the Martebo servants might not be wearing hoods/cloaks at all (both here and on Facebook) - that it's the dresses hitched up over a belt in combination with wide sleeves that narrow towards the wrists instead. Taking another look at the photos, I think I agree. Considering that the carvings are early 14th century, it fits so much better with contemporary fashion and preserved dresses like those of Elizabeth of Thuringia and St Clare. The reason I saw hoods is the rather sharp divide between the upper and lower part of the dresses and the deep fold by the shoulder: I have inserted gores on one of my hoods that look just like that! 
Female servants, Martebo Church, Gotland, first half 14th century. Pix by Vix.
Judging by the terms used in medieval wills, outer clothing seems to be reasonably flexible when it comes to gender. Or at least that's what I'm trying to convince myself... To make my hood a little less like the standard shepherd's hood, I chose to base it on...wait for it!...a swineherd's hood instead. With buttons down the front. A completely different kind of animal! ;-)
Carving from the choir stalls, Lund Cathedral.1370s. Pic by Vix.
The carving comes from the choir stalls of Lund Cathedral. The good thing about it is that it's probably of German origin, which suits my kit perfectly. If I'm going to wear a garment that's not particularly female, I at least want it to be geographically suitable.  

The shape of the thing, pieced together – Sometimes there's just enough thread... Finishing the edges
The pattern I opted for was simple enough. I used an existing pattern of a Herjolfsnes-type hood, did away with the front gore and just added enough length for it to reach down to my hands. I had to piece my fabric a little, but other than that, only one long back seam was needed to put it together. I lined it with a very thin, dark grey worsted fabric. Since both my fabrics were grey, I decided to compensate for the lack of fancy colours by putting more effort into the finishing details. I stitched around all the edges and hems with tiny red stitches. It looked very nice, but took just about forever to do, and I quickly abandoned my original idea to make two rows of stitches (like they have done on some of the Herjolfsnes clothes). I also decided to use pewter buttons for the front, to save time (and add fanciness!). On the choir stall carving, it's hard to tell exactly how the buttons are placed, at least from my photos. Sometimes the buttons seem to be placed two and two together, in places there might even be three. Or maybe they're spaced evenly, but the carving's a bit worn. Since I couldn't go to Lund to double check (or had time to send one of my minions), I decided to place them evenly, but ran out of both time and buttons. For the pilgrimage, I made do with just half of the intended number of buttons and added the rest...well, yesterday, actually.

The jättehätta ready for the pilgrimage – With the last of the buttons added

Edit 2015-01-10: I found another image of a woman wearing a short cloak: Herodias (mother of Salome) in the Triptych of the Martyrs from Dijon, dated to 1390-91. Being worn by a queen, it's a far fancier garment than the swineherd's hood, but not completely dissimilar to the jättehätta I made!
Herodias and Herod, from the Triptych of the Martyrs, Dijon, 1390-91.

The pilgrimage
So, what about this pilgrimage then? Here you can read some of the organiser Frida's thoughts about the project: The medieval pilgrimage reenacted. During four days in May this year, a motley crew of 12 pilgrims, two dogs and four horses walked about 55 km along the medieval pilgrim route between Visby and S:t Olofsholm on the island of Gotland. 

Unlike medieval pilgrims, we slept in tents, and brought all our food with us. In medieval times, pilgrims travelled lightly and would have found housing and food along the way to refuse hospitality to a pilgrim was considered extremely bad manners... In medieval Sweden, there was a law that stated that there should be a hostel or similar place for travelling people to spend the night no more than a day's march apart (a day's march was considered to be about 30-40 km), so pilgrims would have had little trouble finding a place to stay. And sleeping outdoors was of course always an option. Being modern medieval pilgrims, however, we were not particularly used to sleeping rough, and although asking people along the way to let us stay the night would have been the medieval way to do it, sleeping in a modern place would just have felt wrong. So tents it was. The upside of bringing so much stuff with us was the sumpter horses. To have horses around made an already fantastic experience even better. I'm actually afraid of horses, so it felt very good when I, on the very last day of the pilgrimage, even dared to ride for the first time in my life! 

For me, despite not being religious in my everyday life, the pilgrimage still ended up being a spiritual experience. I got time to slow down, to think and feel, and I realised a lot of things about myself. It also gave me a different understanding about medieval life and religion and how different things were back then. Walking 50 km in medieval shoes was definitely an interesting experience, both for my boots and my wimpy modern feet... It was a good thing I finished my big hood, too. The weather was quite good most of the time, but it started raining on the very last morning and it continued raining throughout the day. My hood did its job as you can see towards the end of this little film that Johan made about our pilgrimage:

Medieval Pilgrimage 2013!

I promised myself I would finish this post before Christmas...and well, I suppose I have. I haven't written anything about the leather costrel that I also made for the pilgrimage. Or my staff and scrip, which were blessed by the Bishop of Visby during the send-off mass. But this post is long and rambling enough as it is, so I'll just finish off with a few pictures from the road instead...

Getting to know the horses
The road goes on...
At Väskinde Church, the old wall still had stones with holes for tying up horses!
Johan and pilgrim dog Boudica taking a nap
The boots that did the walking

And last, but not least: Boudica helping to model my jättehätta. With a medieval source...

Happy New Year!


References:
Andersson, Eva. 2006. Kläderna och människan i medeltidens Sverige och Norge. Diss. Göteborg: Göteborgs universitet, 2006. [https://gupea.ub.gu.se/bitstream/2077/16894/5/gupea_2077_16894_5.pdf]

Dahl, Camilla Luise. 2005. Workpapers – tekstilforskning på Middelaldercentret vol. 1. [http://www.middelaldercentret.dk/pdf/workpapersvol1.pdf]

Monday, 25 July 2011

The Cap of St. Birgitta - second version

I've never really worn the Birgitta cap I made three years ago. When it came to actually using it, I wasn't happy with it at all. Every time I was about to put on a medieval headdress I chose to just tie an all-purpose rectangular piece of cloth around my head and pin a veil to it rather than wearing my cap. Eventually I figured out that I would actually prefer a larger cap than the one I'd made. Something a bit more like the first mock-up I made the last time around, the one I had to scrunch up beyond recognition to compensate for my lack of Proper Hair. 

So I made a new one! I wore it this weekend for the (to my mind) exceptionally paltry Medieval Festival at Bohus fästning, Kungälv (the second link will take you to a slide show of images of Bohus Castle itself - if you put up with the slightly tacky photo montages at the beginning you'll get to see some really spectacular pictures!). The cap, as opposed to the event, was a success!

I still don't have enough hair to fill the cap, but it nevertheless felt a lot better to have that extra fabric to play around with. The problem with the first cap was that it threatened to slide off my head, and I certainly prefer a bit of scrunched-up fabric to having my headgear fall off.

I took the opportunity to explore the art of embroidery a bit further this time and worked a slightly improvised version of interlaced herringbone stitch to join the two halves of the cap. It does look a bit scruffy, but I think it'll even itself out eventually.

The Cap of St. Birgitta - second version
And here's me trying it on and taking a picture of myself without a tripod. My arm is coming off at the shoulder (the camera is heavy!), but I've almost achieved that sought-after pear-shape! Yes, there's an obvious amount of deflated fabric too, but it's all my own hair in there this time!

Going slightly pear-shaped?!


References:
See the first post about the Cap of St. Birgitta, from 2008.